Connect your WooCommerce store with Zenvio
WooCommerce store can be connected with your Zenvio organization using a Zenvio App from WooCommerce store or manually
Connect manually
Create connection in Zenvio
Start with creating a connection to your WooCommerce store in Zenvio.
- Open your Zenvio organization
- In main menu open Integrations
- On WooCommerce card click + Connect
- Set Integrate manually option and click Next
- Fill Name of your store and URL address, click Next
Connection is successfully stored in Zenvio and you see list of webhooks that needs to be added to your WooCommerce store. Keep this tab open, you will copy data from this tab.
Add webhooks in your WooCommerce store
Continue with setting up webhooks in your WooCommerce store.
- Go to your store Admin
- Navigate to WooCommerce → Settings
- Open Advanced tab
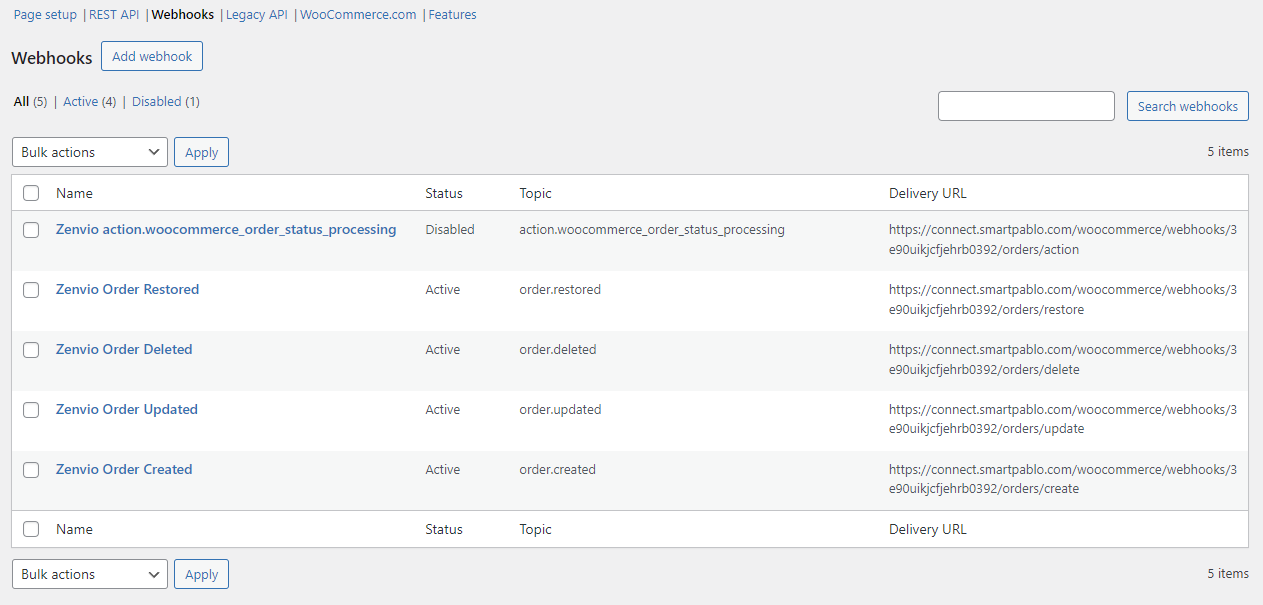
- Go to Webhooks section and click Add webhook
- Fill form with values available in your Zenvio account and Save webhook
- Repeat this for all Webhooks available in your Zenvio account
After this, your WooCommerce settings should look similar to this
Invoice creation and delivery
Choose whether invoices are created for all orders, paid orders or completed orders. Review automatic versus manual sending separately. The integration brings store activity into Zenvio; check a representative order, invoice and delivery result before relying on it. Accounting processing follows separately.