Collect business details and EU VAT numbers
Use the exact field names below so Zenvio can read the identifiers. Test a business order and check the resulting invoice before publishing theme changes.
Business identifiers
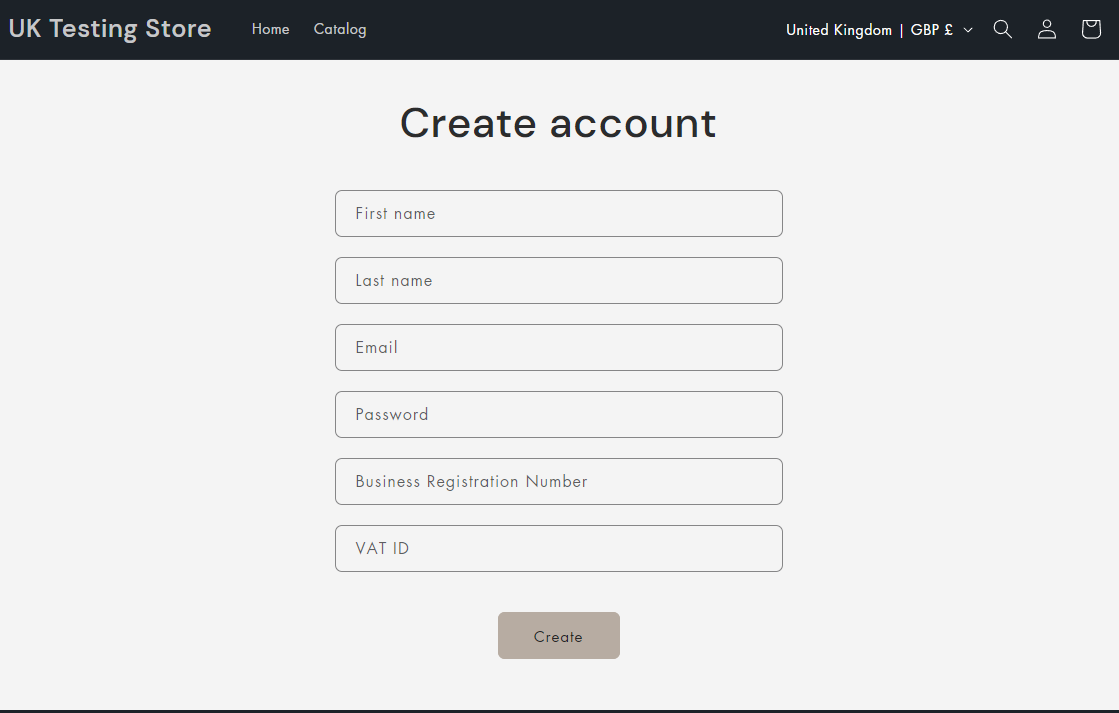
Legacy customer registration
In Shopify admin, open Online Store → Themes → Edit code on a copy of your theme. Find the legacy registration form, typically in sections/main-register.liquid or customers/register.liquid. Place the fields inside the existing form. These fields store values in customer notes; they are for legacy account templates.
<label for="zenvio_registration">Company Registration Number</label>
<input id="zenvio_registration" name="customer[note][Company Registration Number]" type="text">

<label for="zenvio_vat">VAT Registration Number</label>
<input id="zenvio_vat" name="customer[note][VAT Registration Number]" type="text">
Cart page or cart drawer
Use cart attributes to pass the values through to the order. For a cart page, look for main-cart-footer.liquid or the section that renders the cart form. For a drawer, look for cart-drawer.liquid or the equivalent snippet. Put the inputs inside the form that submits the cart. If they sit outside it, associate them with that form using its actual id in the form attribute. Verify the drawer's checkout action saves the attributes.
<label for="zenvio_cart_registration">Company Registration Number</label>
<input id="zenvio_cart_registration" name="attributes[Company Registration Number]" type="text"
  value="{{ cart.attributes['Company Registration Number'] | escape }}">

<label for="zenvio_cart_vat">VAT Registration Number</label>
<input id="zenvio_cart_vat" name="attributes[VAT Registration Number]" type="text"
  value="{{ cart.attributes['VAT Registration Number'] | escape }}">

If both forms render on the same page, give their inputs and labels different IDs and keep the attribute names unchanged. Confirm the fields appear on the Shopify order before checking the Zenvio invoice. Test any accelerated checkout route separately; it can skip the cart.
EU VAT collection
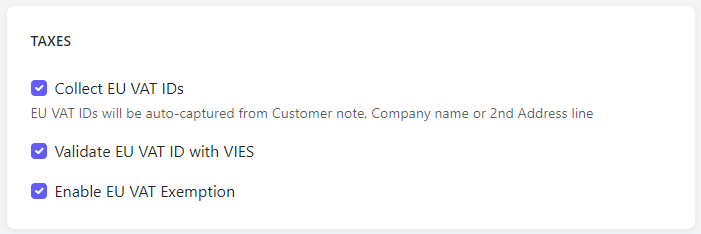
In Integrations → Shopify → Configuration, review Collect EU VAT Numbers and, where appropriate for your setup, Enable EU VAT Exemptions. Save the settings. Collecting an identifier and applying a tax treatment are separate checks.
Configure the storefront helper
For a theme-based storefront that uses the Zenvio VAT helper, open Online Store → Themes → Edit code. Add the following once in layout/theme.liquid, before the closing </body> tag. If the helper is already present, update the existing configuration instead of loading it twice.
<script id="zenvio-script" src="https://cdn.zenvio.com/apps/shopify/client.js"></script>
<script>
  Zenvio.configure({
    customer: {
      id: {{ customer.id | json }},
      email: {{ customer.email | json }},
      metafields: {{ customer.metafields.zenvio | json }}
    },
    cart: { attributes: {{ cart.attributes | json }} }
  });
  {% if request.page_type == 'customers/register' %}
    Zenvio.VAT.onCustomerRegister();
  {% elsif request.page_type == 'product' %}
    Zenvio.VAT.onProduct();
  {% endif %}
</script>
The registration hook is for legacy accounts, and the product hook runs on product pages. This is storefront theme code; it does not add fields to current customer accounts or Shopify checkout.
Verify the result
- Test the relevant storefront page with the edited theme and submit an order with business details.
- Check that the values appear in the customer notes or order attributes, depending on where they were entered.
- Open the resulting Zenvio invoice. Review the company details, VAT number and the tax applied to the order. If details are missing, check the exact input names and whether Shopify submitted them before invoice creation.
For tax configuration in Zenvio, see Tax registrations and configuration.